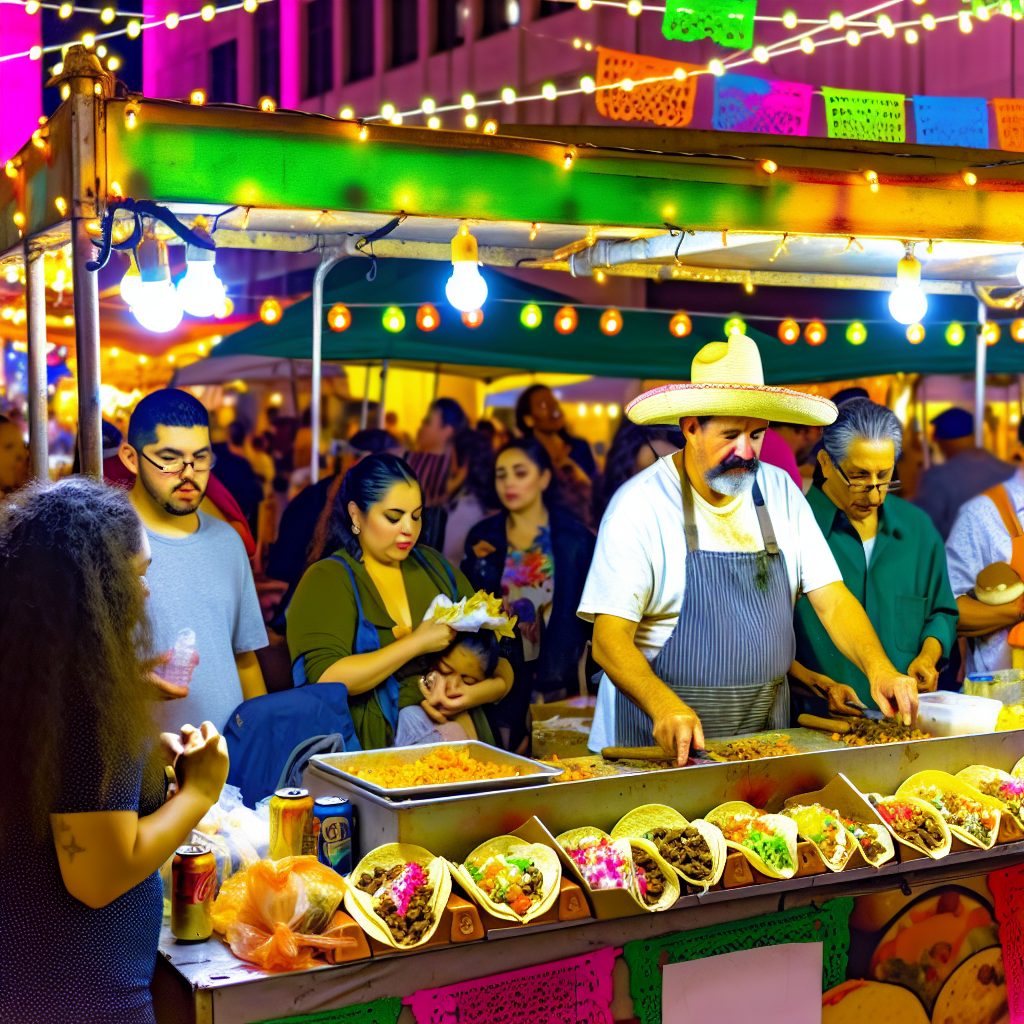
Welcome to a delicious adventure in Minecraft, where your taco truck vision transforms into pixelated reality! Whether you’re a cuisine lover or a corporate HR team planning an event, building a taco truck is a whimsical and enjoyable project that brings a slice of culinary culture to your Minecraft world. Each chapter will guide you step-by-step, from crafting the structure of your taco truck to incorporating tasty design elements and fun redstone mechanics. Get ready to unleash your creativity and share mouthwatering tacos without ever leaving your blocky digital universe!
Building Your Taco Truck: A Practical, Step-by-Step Minecraft Blueprint
Creating a taco truck in Minecraft is both an architectural exercise and a playful tribute to street food culture. This chapter walks you through a single, continuous process that turns raw materials into a lively, functional taco truck. The goal is a build that looks believable, feels fun to interact with, and fits naturally into your world—whether parked by a village square, tucked next to a player base, or rolling along a creative server’s main avenue.
Start by choosing a site that gives your build context. A flat patch beside a village market or near a road creates a sense of purpose. If you prefer a standalone landmark, place the truck on a paved plaza or by a scenic overlook. Make a small paved area first: a 6×10 stone slab or cobblestone rectangle will frame the truck and offer space for queues, lanterns, and a trash bin made from a cauldron and slabs. This small plaza makes the truck look like it belongs.
Gather your primary materials with an eye for contrast and texture. Concrete or smooth stone bricks give a polished, modern look. Dark oak or spruce planks add warmth and a rustic vibe. Use glass panes for windows. Slabs and stairs let you craft smooth rooflines and counters. Signs, item frames, banners, carpets, and lanterns provide personality. For food props, collect cocoa beans, carrots, beetroot, wheat, and different colored wool. If you want automated touches, add dispensers, redstone dust, pressure plates, and note blocks. In Creative Mode, grab all these quickly. In Survival, plan a small farm for wheat and carrots to keep your food props stocked.
Build the chassis first. Imagine the truck as a 4×8 rectangle on the ground for a compact food truck, or 4×10 for a larger mobile kitchen. Elevate the base by one slab to suggest a chassis. Place four larger blocks at the corners as wheels; stone bricks or black glazed terracotta work well. Surround each wheel with stair blocks or slabs to imitate wheel arches. Keep the front slightly wider than the rear for a believable cab silhouette. A gradual slope made from stairs helps the front look aerodynamic.
For the cab, create a two-block-high box at the front of the chassis. Use glass panes for windshield and side windows. A fence and a wooden slab can simulate a simple driver’s seat and dashboard. Add a sign as a license plate and place a lever or button as a gear shifter. These details are tiny but lend huge authenticity. Behind the cab, design a raised truck bed. Raise this area by one block and use slabs for the counter to keep the surface clean and accessible. Leave a three-block opening along one side for service. This opening becomes your counter where players order.
Craft the counter layout with player interaction in mind. Place trapdoors or fence gates that serve as pass-throughs. Item frames on the counter wall display menu items—use carrots, cooked beef, or bread as visual stand-ins. For taco props, arrange cocoa beans and wheat in chests or on top of dispensers disguised as serving trays. Carrots and beetroot add color. Use slabs and carpet to build a small overhead awning that shelters customers. Hang banners or signs from it with the truck name or a catchy phrase.
The roof and signage define the truck’s silhouette at a distance. Build a low, sloped roof with slabs or stairs that extends slightly over the counter. Use a row of signs across the top to spell the truck’s name. For a bolder logo, craft a banner combining dyes to form a taco motif, or paint a simple graphic using different colored wool blocks. Light the roofline with lanterns or glowstone hidden behind trapdoors. These lighting choices make the truck inviting at night.
Internal storage and cooking areas make your truck feel genuine. Behind the counter, create a small kitchen area two blocks deep. Place furnaces or blast furnaces to represent grills. Use cauldrons, barrels, and chests for storage. Item frames above storage can list ingredients. If you want interactivity, put cooked food in dispensers and connect them to a pressure plate placed by the counter. A pressure plate can trigger a dispenser that drops a carrot or cooked meat, simulating a served taco. Add a note block or two that plays when a trade occurs. Keep the redstone simple; a single pressure plate and repeater will often suffice.
Detailing elevates a good build to a memorable one. Use banners and paintings to add color and branding. A small menu board, made from signs, lists mock prices and daily specials. Place a potted plant on the counter for visual softness. Create a small trash station at the side of your plaza using a cauldron and trapdoor to keep things tidy. Scatter a few stools from slabs and signs so NPCs or players can sit. If you want a vendor, summon or spawn a villager and place them near the counter, wearing an apron-themed banner or standing behind a lectern to simulate order taking.
Consider ambient props to make the scene believable. A stack of crates made from trapdoors and chests suggests inventory. A cooler or fridge can be a large chest with iron trapdoors and a sign. For a prep station, use a crafting table and item frames to show raw ingredients. If you want a festive vibe, string up wool carpets as bunting and place a jukebox nearby for music. Small details such as a broom (an arrow on the ground) leaning against the truck, or a cooked fish in an item frame labeled “Special,” increase immersion.
If you add redstone, keep it accessible and visible for learning. A simple vending system trades an emerald for a food item using hoppers and droppers. Use a comparator to detect items placed in a chest and then trigger a dispenser to drop the taco item. Redstone lamps can light when someone steps on a pressure plate, and pistons can fold out a small sign. For moving parts, sticky pistons and observers create short animated motions, like a sliding menu. Use these sparingly; they are fun but can complicate the build if overused.
Lighting and safety matter, especially in Survival. Light the surrounding plaza with lanterns to prevent mob spawns. Add a roof overhang and walls on the back of the truck to protect furnaces and chests. If your server allows, add slabs around the base to prevent endermen or other mobs from teleporting too close. Consider a simple iron door or fence gate at the rear to secure supplies.
Finally, invite people to interact. Place a sign that reads “Open” and rotate a banner color to indicate hours. Host a mini-event nearby. You can use the truck as a role-play hub, a quest marker, or a decorative landmark. If you want inspiration on different successful real-world truck designs and models, check out this short article on taco truck models for culinary ventures: Taco Trucks Unleashed: Top 5 Models for Culinary Success.
This project blends architecture, storytelling, and light redstone creativity. Keep your lines clean and your details intentional. A compact footprint, thoughtful props, and a few interactive features make the build feel complete. With these steps, your taco truck will be a vivid, playable addition to any Minecraft landscape.
Wheeling Flavor: Designing a Minecraft Taco Truck That Feels Real

Designing a taco truck in Minecraft is more than a block-by-block exercise; it is a chance to translate street-side charm into a portable, shareable construct that sits confidently in your digital world. The aim is to fuse sturdy, believable architecture with playful flourishes that signal a kitchen on wheels, where color, texture, and a few clever touches communicate the idea of sizzling tortillas and bright, fresh toppings without ever needing a single real-world recipe. In this chapter, we move through a single, continuous sense of building that emphasizes atmosphere, function, and the small storytelling details that turn a simple shell into an inviting destination for players who wander your map. The process begins with a clear sense of place and proportion, then expands into the menu display, the cooking and service area, and the little touches that make the truck feel alive when the sun goes down. The resulting craft is a piece of Minecraft that invites conversation, collaboration, and a shared moment of imaginative dining some players might never have expected to find on a blocky world, yet will immediately recognize as a taco experience writ large in cubic form. When you peak behind the scenes of this design, you discover how color, signage, and strategic layout behave like seasoning—subtle, essential, and easily adjustable to suit your own style and the geography of your build space. In fact, a well-tuned taco truck can become a centerpiece in a village market, a roadside attraction near a bustling base, or a playful waypoint along a road that threads through your creative landscape. The trick lies in balancing form with function, so the truck reads at a glance as a food stand, while its internal layout quietly communicates efficiency and care. You want visitors to feel as if they could step up to the service window and order, even if the world is made of redstone, glass, and wool. This chapter leans into that balance, drawing on the practical steps of construction while weaving a story about a cart that brings a little fiesta to your pixels. To begin, choose a location that tells a story before you lay a single block. A flat plot works best, but a gentle slope can be tamed with a small foundation that raises the truck slightly above the ground, giving it presence and a sense of movement. Position the stand near a village square, a marketplace, or a base hub where players naturally congregate. In a world where distance often decides where players linger, the taco truck becomes a magnet by virtue of its color and silhouette. The chassis should be sturdy, a physical statement in the Minecraft palette. A long rectangular base—think four blocks by six—serves as a believable canvas for the body of the vehicle. For the color story, you have two primary routes. One leans into a modern, urban vibe by using dark concrete or smooth stone bricks in charcoal, slate, and graphite hues; the other leans rustic Americana by bringing in dark oak planks or other warm woods to suggest a well-loved, road-worn truck. Either choice works, and you can even blend them with a carefully chosen accent color to signal the taco theme. A strong head of the truck, or the cab, should feel like a real space where a driver would perch. Glass panes or fences make the windows, while a modest seat can be represented by a chest or a fence to hint at the driver’s presence. The essential idea is to give the vehicle a rational silhouette that is easy to recognize at a distance, so passersby instantly know this is a food stand, not a random block pile. A lightly raised back, the bed, provides the serving area and a stage for display. The display itself is where the creative spark catches fire. The heart of the taco truck’s flavor lives in the way you present the food. A simple yet effective approach is to use cocoa beans as little taco shells—brown, round, and recognizable in the right lighting. Carrots become the vibrant fillings, with beetroot offering a spicy red sauce when you want a touch of heat in the color story. Wheat can be tucked into the display as a stand-in for tortilla wraps, rolled and ready to be imagined as warm and fresh. Rather than clutter, arrange these items with a sense of order that reads to players as an actual menu case. You might place the edible props on a dispenser line or inside chests labeled with signs that say TACOS, using bold, legible lettering created by arranging the blocks in a way that reads clearly from a distance. The signage itself becomes a crucial storytelling device. A simple, legible sign is enough to communicate the concept, but the most satisfying builds take that sign into the realm of character. A small roofline or an awning can be accomplished with slabs and carpets to give the truck a shaded overhang, perfect for shading the service window. When lighting is scarce, glowstone or lanterns tucked under the edge of the awning can imply warmth and invitation, turning the truck into a beacon after dusk. The service window should be approachable and practical. A set of fences or a gate forms a window frame that fans out into a low counter. The counter is the interface where the player interacts with the tacos, and here you can simulate a kitchen behind the window. In Minecraft logic, the kitchen is a stage: a workbench or an anvil-turned prep area, perhaps a furnace to hint at cooking, and a chest or barrel for ingredients. The idea is not to overcomplicate the scene but to convey a believable workflow. A compact kitchen layout can be designed to fit within the back of the truck or just behind the service window so that the player seems to move from preparation to service with a natural, human rhythm. Some builders will enjoy introducing redstone accents to suggest a more interactive experience. A dispenser filled with taco items could respond to player proximity, producing a small pop of color as if a taco is being handed over. A pressure plate in front of the window might trigger a note block melody or a subtle redstone signal to an indicator block signaling the stock level of tacos. If you want to keep the mechanism purely decorative, use signs and blocks to suggest a working kitchen without adding complexity. The ambiance of the truck is as important as the mechanics. A little Patagonia of decor helps readers feel the street and the heat of a taco stand. Vines or potted cacti can anchor the truck in a desert street setting; a string of Mexican-flavored banners or a weave of rainbow wool flags along the top edge can evoke a festive mood. Ground texture matters, too. Sand-colored blocks, clay tiles, or ceramic-like textures evoke the look of a sidewalk and a sunlit street. You can even simulate a desert street environment by laying down a light, pale-toned base and peppering it with small details like oil slicks of black wool or a few scattered tiles to break up the surface. Night lighting should be thought through as a storytelling tool. The glow of lanterns can highlight the sign, the service window, and the display, making the truck pop against a dark sky. A simple, tasteful color scheme paired with a few high-contrast accents ensures readability at a distance. As with any build, the aim is to invite players to stop, look, and explore the little world you’ve created. To deepen the sense of realism and connection, you can fashion a small, implied backstory. Perhaps the truck is a family business that roams a virtual town, or maybe it is a mobile試 kitchen that rolled into a village festival to share a taste of a far-off street—this is Minecraft, after all, where the only limit is imagination. A few thoughtful touches can encourage players to linger. A small sign with a daily special, a banner bearing a color stripe reminiscent of a flag, or a guitar model perched on the side of the truck all contribute to atmosphere without consuming precious build space. The easiest way to bring life to the scene is to introduce a few living elements: a cat or dog companion nearby, perhaps a villager interaction at the window, or even a single NPC to imply the human heartbeat of the business. These props are not mere garnish; they anchor the build in the social reality of a bustling street, reminding players that a taco truck is a place where people meet, eat, and trade stories. The Taco Truck design invites you to consider not just how it looks, but how it feels to approach and interact with it. You want the experience to be intuitive: a service window that invites a quick exchange, a small kitchen that hints at careful preparation, and a display that makes the imagination of tacos come alive. The moment a player glimpses the blocky shape, the bright sign, and the colorful display, they understand what this little vehicle represents. It becomes part of the village’s texture, a recognizable feature that adds texture and texture that invites people to explore. In crafting this, remember that Minecraft rewards clarity as much as whimsy. The most successful taco trucks strike a balance where every component communicates purpose and character without overwhelming the senses. To that end, avoid overstuffing the truck with too many tiny details that may read as clutter from a distance. Instead, let color and form do the legwork. If you want an added layer of polish, you can curate a small, decorative menu wall on the side of the truck using signs and tiny icons. A chalkboard effect can be mimicked with signs and dyed glass to create a readable, playful display of items and prices. The display wall becomes a subtle stage for your creative flavors and textures, inviting players to imagine the sizzle and aroma of the dishes as they move around the map. The final effect should be both convincing and enchanting: a vehicle that looks like it could roll into any town and start selling warm tortillas and vibrant fillings, a place where a player can pause, watch, and engage with the scene. In this sense, the taco truck becomes a symbol of how Minecraft can translate real-world joy into a playful, shareable architectural achievement. If you want to explore a broader set of ideas about vehicle-based builds and their social role, you can look to guides that compare models and styles, using the language of design to inform your own approach. This is where the balance of aesthetics and function shines most brightly: the truck’s silhouette says it all, the signage confirms the story, the kitchen and display communicate the workflow, and the surrounding environment completes the scene with atmosphere. The result is a cohesive experience that not only looks good but feels dynamic—an invitation to players to walk up, imagine a perfect bite of taco, and stay for a moment more to see what other stories your Minecraft world might offer. For further inspiration and practical pointers, consider a resource that discusses menu display, kitchen adjacency, and the general philosophy of food-truck design within a Minecraft context. This helps ensure your build resonates with others who seek similar experiences and reinforces the sense that cuisine and community can live side by side in a blocky landscape. Taco Trucks Unleashed: Top Models for Culinary Success. In addition to these ideas, a canonical external reference can help you visualize and plan a more robust, authentic look. For readers who want to see a formal design guide, the official Minecraft article on food truck design provides a detailed, step-by-step walkthrough that complements the practical on-block choices with a broader design philosophy. External resource: Minecraft Food Truck Design: Step-by-Step Tutorial https://www.minecraft.net/en-us/article/minecraft-food-truck-design-step-step-tutorial
null
null
Turning Your Taco Truck into a Smart Stop: Redstone Upgrades That Bring It to Life

A taco truck in Minecraft is charming on its own, but adding redstone turns it from a static prop into a living part of your world. With a few compact circuits and some clever placement, you can simulate serving, selling, and signaling—making the truck feel like a real destination. This chapter walks through practical redstone features you can add to your taco truck: automated dispensing and ingredient flow, a simple payment system, dynamic lighting and signage, and small interactive flourishes that fit a truck’s scale. The aim is to keep designs compact and intuitive so they blend with the build without requiring a full redstone workshop.
Start by thinking about what you want the truck to do. Do you want it to hand out items? Accept payment? Broadcast that it’s open? Each function maps to a small set of redstone components: hoppers and minecarts for item movement, comparators and droppers for simple transactions, dispensers or droppers for serving, and redstone lamps or note blocks for visual and audio feedback. The rest is layout and testing.
For a believable automated food line, create a hidden storage area beneath or behind the truck. Use chests as ingredient reservoirs and connect them with hoppers to a central preparation point. If you want a moving supply line that feels lively, hide a hopper minecart under the truck on rails. Fill a chest above with your chosen taco representational items—carrots, beetroot, wheat—and the hopper minecart will draw items from below and push them into a waiting hopper under a dispenser. This simulates a conveyor belt of ingredients flowing to the kitchen window. Keep rails and minecart one block under floor level to maintain the truck’s silhouette.
At the serving window, place a dispenser or dropper behind a counter. A button or pressure plate on the counter gives a satisfying tactile interface. Connect the button to the dispenser with a short redstone line and a repeater if you need to extend the pulse. For added charm, make the dispenser fire a harmless projectile—an egg or snowball—so the taco appears to be tossed to the customer. If you prefer items that players can pick up, use a dropper aimed at the ground or an open hopper that spits items onto a small display chest labeled with signs.
To prevent the dispenser from emptying instantly when multiple players spam the button, build a simple cooldown using a repeater loop or a comparator clock gated by a sticky piston. A three-repeater delay will often be enough to pace the serving action. For sturdier control, implement a monostable circuit: the button triggers a short timed pulse that reliably actuates the dispenser once per press.
If you want ingredients to be processed—say to simulate cooking—use a furnace or smoker as the “grill.” Hoppers can feed raw materials from the storage chest into the furnace, and another hopper pulls cooked items into a holding chest for dispensing. Connect an observer or comparator to the output chest to detect when cooked tacos are ready, then trigger a redstone lamp or note block to celebrate each sale.
A payment system is the trickiest but most rewarding redstone feature. Keep it simple: a player activates a button or steps on a pressure plate in front of the window. That activation should trigger a conditional check that verifies payment. A compact way to emulate payment without commands is to use a comparator reading a hopper or chest. Place a chest where players must deposit a coin item (gold ingot, for example). The comparator detects items entering the chest and emits a redstone signal. Route that signal to open a locked path to the dispenser or to unlock a piston that reveals the serving button for a short moment. The result feels like a vending mechanism: deposit the coin, then press to receive food.
If your server or world allows command blocks, you can make a cleaner transaction: a button triggers a command block that takes an item from the player and gives a custom-named taco. But on standard survival or creative without commands, the hopper-comparator approach is immersive and fully vanilla-compliant.
Dynamic signage is a small but powerful touch. Use redstone lamps with banners or signs to show “OPEN” or “CLOSED.” A hopper clock or daylight sensor can toggle the lamp pattern on a schedule, simulating business hours. Alternatively, wire a pressure plate on the truck’s approach path to light lamps when a customer arrives. Note blocks add personality—set a short jig to play when the truck opens or when a taco is served. Keep note-block melodies simple and short so they don’t become annoying.
For signage that changes text or visuals, pistons can shift parts of a banner or map panel. A compact piston array can flip a small signboard to show different words, but this is optional and best for players who enjoy mechanical builds. Instead, simpler animated signs using lamps and patterns are easier to build and maintain.
Lighting and ambiance are crucial for night-time charm. Redstone lamps with a hidden daylight sensor can automatically switch the truck’s lights on at dusk. Alternatively, make a manual switch—an accessible lever by the window gives you control. Small redstone clocks can make lights blink gently, imitating neon signage. Use subtle timing so the blink reads as lively rather than distracting.
When building redstone into a compact vehicle, conceal wiring cleverly. Use slabs, carpets, and trapdoors to hide dust lines. Place repeaters inside seats, under counters, or inside the raised truck bed. Use upside-down stairs or banners to mask open hoppers and minecart rails. The goal is to preserve the truck’s shape while making the circuitry serviceable; leave a removable roof panel or a trapdoor for maintenance.
Testing and debugging will save time later. Start with each subsystem separately: verify the hopper minecart correctly feeds a dispenser; test the comparator chest payment to ensure its signal strength meets the gate; run the light sensor overnight to confirm timing. Use redstone torches and dust to visualize current flow when troubleshooting. If an output isn’t triggering, check for a locked chest or a misaligned repeater. Remember that repeater orientation matters and that comparators read container contents only when placed adjacent to hoppers or chests.
Space and resource constraints matter on survival servers. Where space is tight, stack systems vertically. A chest feeding a hopper into a furnace, then into another hopper and dispenser can fit in a single two-block vertical shaft behind the serving window. Vertical layouts reduce horizontal clutter and keep the truck’s profile intact.
Interactive extras create a memorable experience. Place an NPC or tamed wolf near the truck for ambiance. Add a small chalkboard menu—use signs or item frames with renamed items to show offerings and prices. Create a small queue area with fence gates and pressure plates that signal customer presence when stepped on. Integrate a jukebox with a hidden redstone trigger for late-night vibes. All these touches increase immersion with minimal circuitry.
Finally, think about durability and grief protection if you’re on a shared server. Encasing key redstone components in blast-resistant blocks or positioning them inside locked areas prevents accidental or malicious damage. Labeling service panels with signs helps other players understand how to restock or repair the truck.
For inspiration and technical reference on redstone behavior, the Minecraft Redstone wiki is an excellent resource. It explains comparator behavior, hopper mechanics, and timing circuits in detail: https://minecraft.fandom.com/wiki/Redstone.
By combining these principles—hidden supply lines, simple payment checks, responsive lighting and signage, and a few playful extras—you’ll transform a decorative taco truck into a dynamic attraction. The best builds balance automation with visual storytelling, so the redstone should enhance the truck’s personality rather than overwhelm it. Keep circuits tidy, test often, and let the truck’s design guide where the mechanics go. If you’d like examples of truck layouts and real-world-inspired variations to spark new ideas, check this curated list of top taco truck models that can translate well into Minecraft: https://ordertacoselpelontacotruck.com/blog/taco-trucks-unleashed-top-5-models-for-culinary-success/.
Final thoughts
Your venture into constructing a taco truck in Minecraft is not just a building project; it’s a celebration of creativity and culinary love encapsulated within the digital realm. By following the steps and design tips shared throughout this article, you get the chance to personalize your taco truck, infusing personality with creativity and technology through redstone features. So, gather your materials, unleash your inner architect, and get ready to serve some delightful tacos to your friends in the fantastic world of Minecraft!